
How to Re-Bloom Orchids From the Orchid Whisperer
I posted (boasted) on Facebook about my success in re-growing my orchids after the untimely passing of their initial blooms, and there was a surge of requests to explain how I did this.
So here my friends is one of my many instructional blogs on how I re-grow my orchids. These techniques worked for me, but are by no means guaranteed for all of you.
First things first: I used to have orchids around my home in various locations. I was using them for decoration. It seems that they knew this and objected to being used in this way. They would die rather quickly and that would be that.
Since I love orchids so much, and wanted all of my inert pots of leaves to re-bloom, I started reading up on them.
I discovered that they thrive in high indirect sun. So I chose a long table by my sunniest window to give all of my ones currently in bloom, and my dormant ones, a permanent place – a home base. They do not like to be moved around, so this is where they stay permanently, even after they bloom. People may object to this part, but I have a little orchid party going on in this section of my home, and other plants elsewhere.
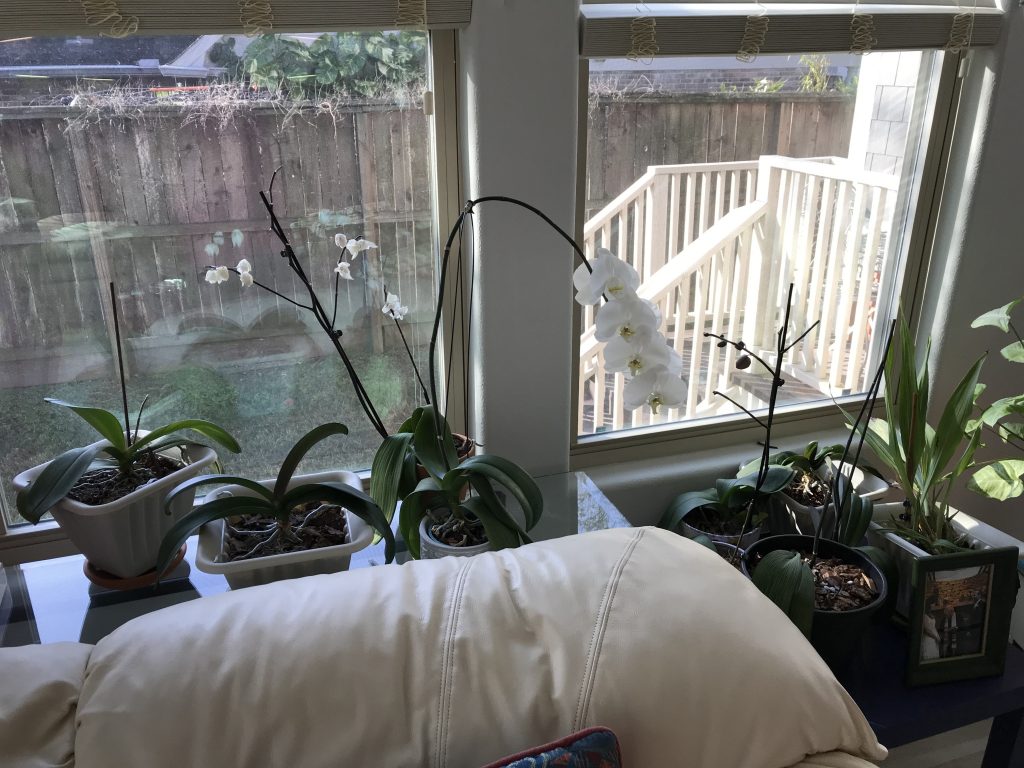
The second most important thing that I have done is that I re-pot all of my orchids once they come home to me. Most were gifts, and a few I bought. They always need a larger pot, and they sell orchid soil, which is just a bunch of wood chips and a bit of soil which when you plant them in a pot of this gives the roots lots of air and room to grow. So carefully re-pot in a larger pot with these wood chips sold as orchid soil.
Next is watering. There is a lot of debate about this one, but my success has come with my preferred method of watering. I put one to two ice cubes (depending on the size of the plant) in the pot once a week. The ice cube melts and drips just a bit of water into the pot slowly. They do not like a lot of water and over-watering kills them faster than anything.
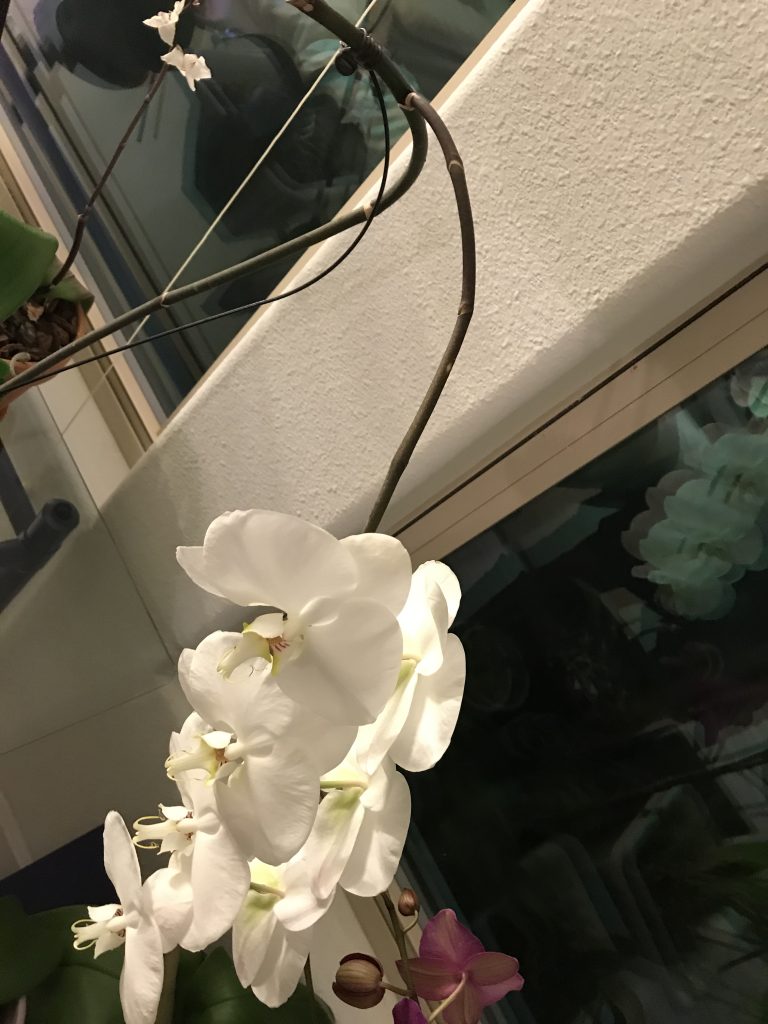
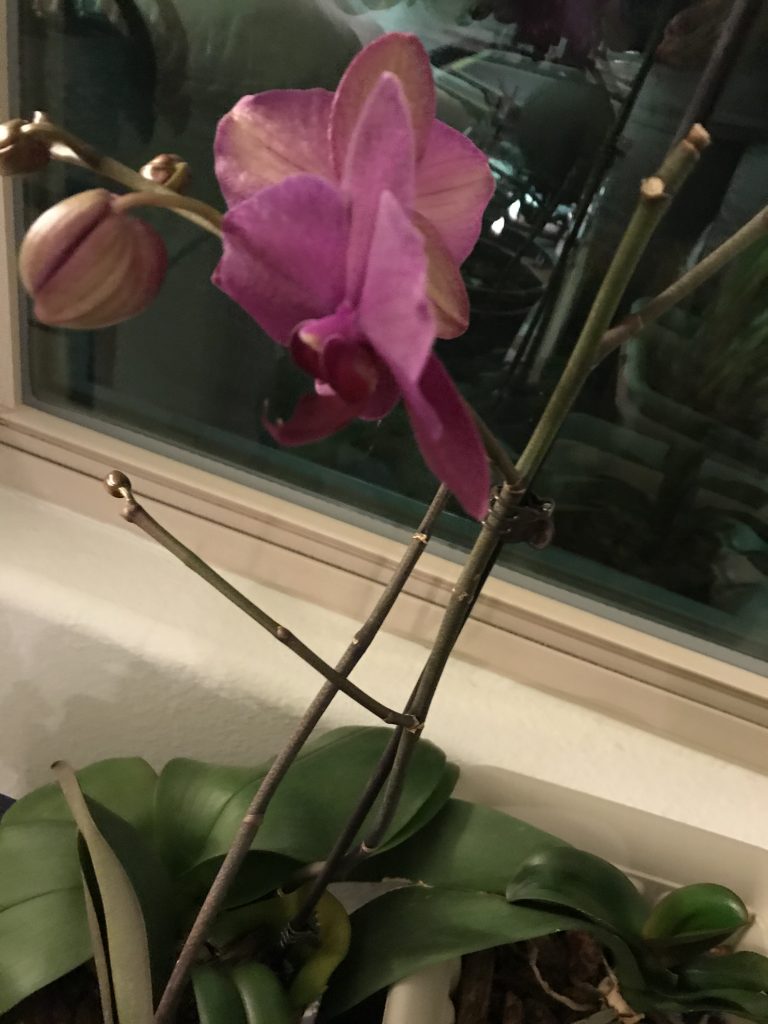
Last is what happens after the blooms die off. I cut the stems (which are still very much alive) to about three quarters leaving lots of orchid stem SEAMS for them to re-bloom from. Before I learned this trick, I waited too long, let the whole stem die and cut the entire stem off. The leaves still looked healthy so I kept the plant, but it takes YEARS for a new stem to bloom from these. However, do not lose hope if that is all you have, because this one pictured, decided to build a new stem from scratch after being dormant for a long while. This one has taken a few years, but it is happily making a comeback with a whole new stem. This is a first for me. Here it is. (Oops I need to polish those leaves too, but it gives you an idea of how old this one is.)
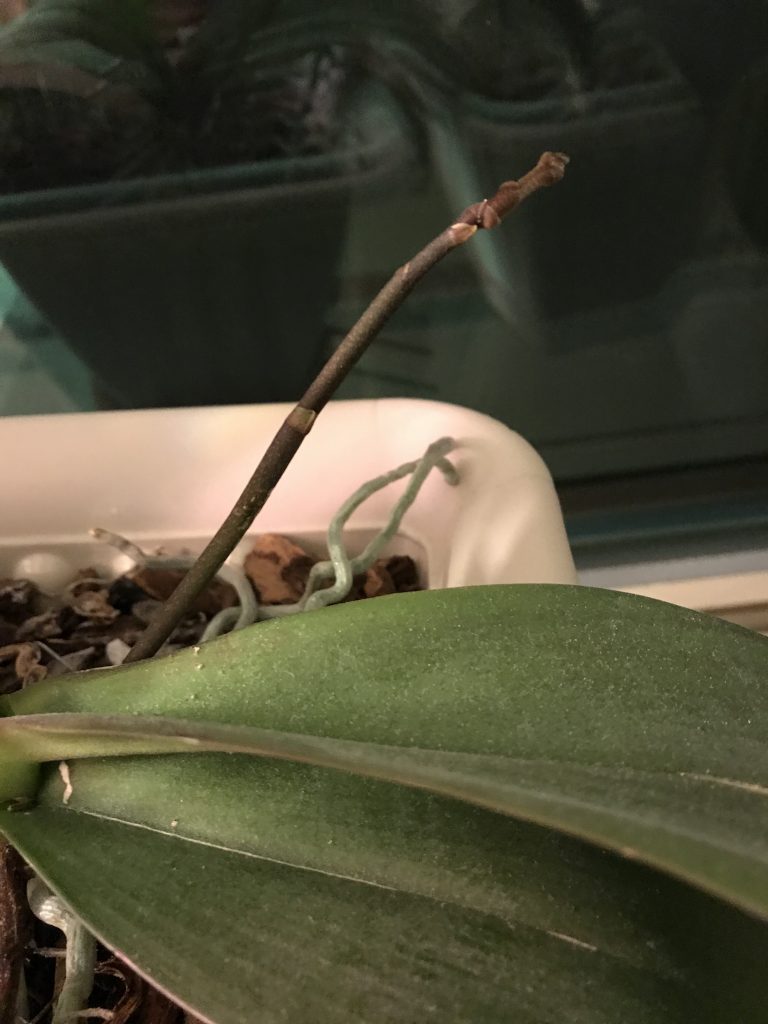
Most of my new re-growth comes from the seams of stems cut back a bit as you can see from the photos here.
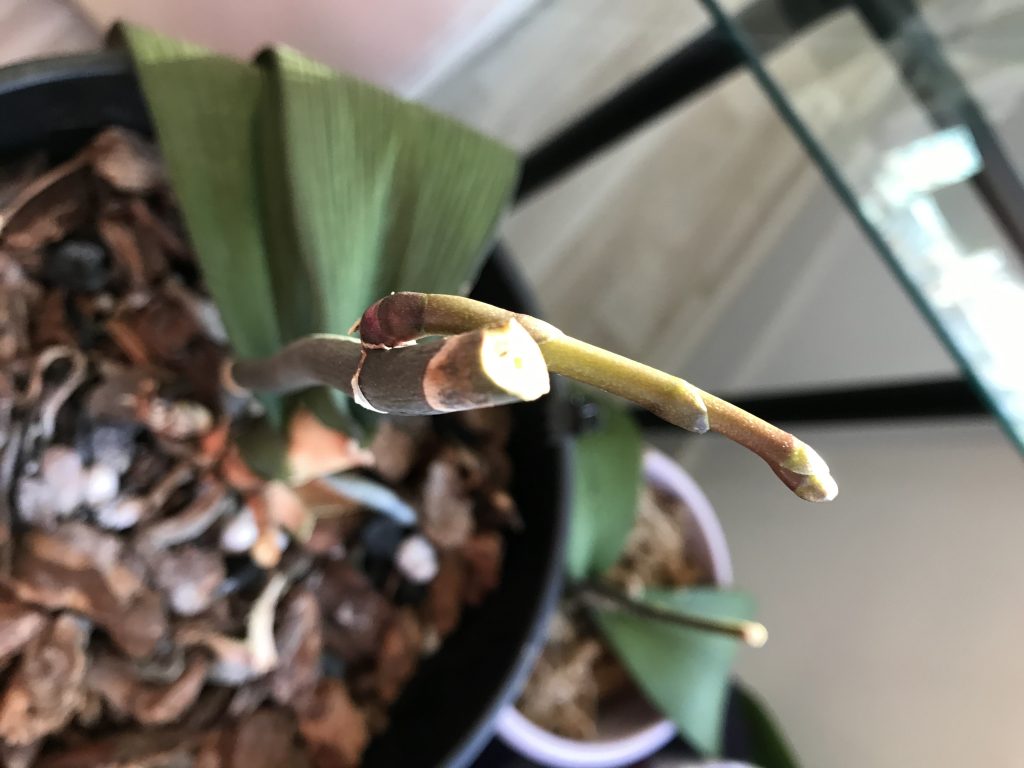
See the one above coming out of the seam? They usually come in sideways, like the one below too:
About the leaves: If your leaves are wrinkly and withered, you have root rot, and you will not get a re-bloom. Throw it out and start all over again. Root rot is common with over-watering or over-crowding the roots. If your leaves are shiny and rubbery looking, you have good roots and you can hope for re-blooms by keeping in high indirect sunlight (through a window) and using the ice cube trick.
I have so much activity going on in my orchid space of my den, that I know I have finally become the orchid whisperer. Prior to this I had the opposite of a green thumb. These tricks worked for me, and I have re-blooms all the time now, though I am still delighted each time it happens. Until they re-bloom, I never remember what color orchid they were or what size flower they had so the re-blooms are always a surprise in that department, and it never fails to delight me.
Send me a note if these work for you and Good Luck!
Arlene, beautiful orchids and your instructions were very insightful. I’ll have to try growing orchids again. Thank you for the tips!
Thanks, Arlene. I can kill a plastic plant but I’m going to purchase one little orchard plant and give this a try!!! <3
Much to do about nothing
strip the Astros of the world series now